**NOTE: YOU MUST BE LOGGED IN AS THE ADMINISTRATOR ON YOUR PC TO SUCCESSFULLY REMOVE SECUROM
Some gamers have had issues with the RegDelNull program not working properly anymore to find and remove some of the SecuROM files. It’s possibly due to a change that may have been made to the latest SecuROM versions, so this removal instructions helps you remove SecuROM without it.
I’ve tried to make these instructions as easy as I could so that almost anyone is able to follow them without too much trouble.
The other alternative to successfully removing SecuROM is to re-format your hard drive. The choice is yours to make.
There are two parts to this tutorial and you must do both parts to be rid of SecuROM from your PC.
Remember, once removed, if you install a game that has SecuOM DRM implemented, you WILL reinstall SecuROM again.
————————————————————-
Here is a very simple tutorial to remove the SecuROM files from your PC.
**Part .1**
Now to start the tutorial for using the SecuROM Removal Tool.
In this part you will be downloading, unzipping, installing and running the SecuROM Remover program:
1. Download the SecuROM Remover zip file from here
2. Unzipping – Extract the files to your C:\ Drive
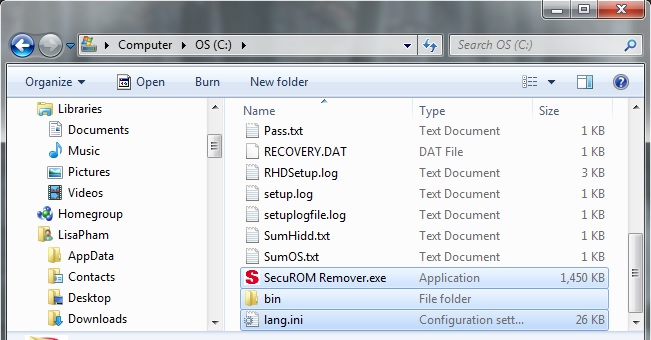
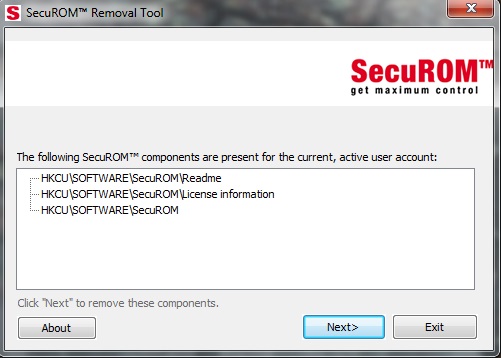
3. Now Double Click on the SecuROM Remover.exe, which will then result in the image below… click Next

4. Once you have clicked Next, which will then result in the image below… The files shown in my image may differ to what you see. It all depends on what SecuROM version you have on your PC. Now click Next
5. Once you have clicked Next, which will then result in the image below… click Exit when it’s completed
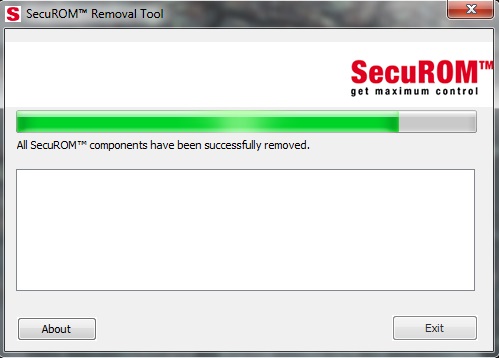
6. Most of the SecuROM files will now have been deleted out of your PC’s System!
7. Now go back and delete those 3 things you placed in your C:\ Drive.. Also delete the zip file you downloaded so it won’t show up in the regestry search. Remember to empty your recycle bin before you start Part 2. See image below
***Don’t run your games off of the CDs/DVD’s anymore or use your original .exe files as that will just re-install SecuROM on your PC.
If you’ve managed to get through that part, then Congratulations! You’re almost there. 🙂
———————————————-
**Part .2**
*Please restart your computer now!
Your next task is to remove the remaining SecuROM files from your Registry. To remove them, please follow the instructions below very carefully:
1. You will need to get into your computers registry –
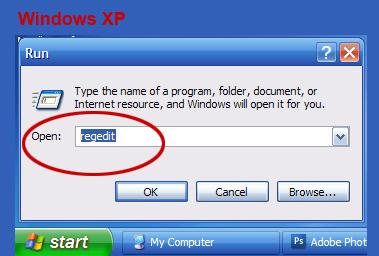
*For XP users – Go to the Start button, then to All Programs then to Accessories then to Run then type in regedit to get to where you search through all your registry files/folders.
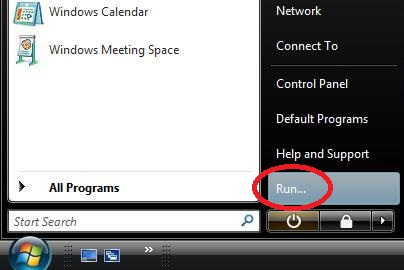
*For VISTA & Windows 7 users – Start by going to the Start button then to Run then type regedit to get in there.
2. Then once you’re in, go to the top menu bar and click on Edit then on find. Type in SecuROM then click on the Find Next button.
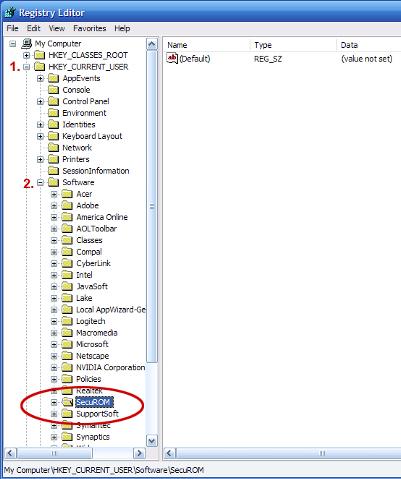
If any results show up…just right-click on it with your mouse button and select delete from the list…it should allow you to remove it.
Then just keep repeating the search by using the ‘F3‘ key on your keyboard until nothing more shows up.
3. You should also do the same search process for the following file names:
CmdLineExt.dll
CmdLineExt01.dll
CmdLineExt02.dll
CmdLineExt03.dll
CmdLineExt
CmdLineExt.exe
CmdLineContextMenu Class
CmdLineExtInstaller.exe
CmdLineExt.CmdLineContextMenu
CmdLineExt.CmdLineContextMenu.1
paull.dll
drm_dyndat_*.dll
drm_dialogs.dll
SecuExp.exe
4. This one is for Win7, Vista and Windows XP 64 users only:
CmdLineExt_x64.dll
If you don’t get any results from some of the file searches, please don’t panic, that just means you have been successful in removing the SecuROM files from your registry properly.
Not all of these files will show up in a search, it just depends on what version of SecuROM was in your PC.
*** IMPORTANT ***
***
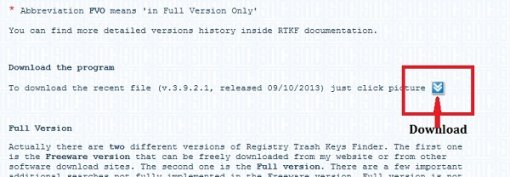
Sometimes the SecuROM / License Information in the registry won’t let you delete it, so if that happens you can download the TrashReg program and install it .
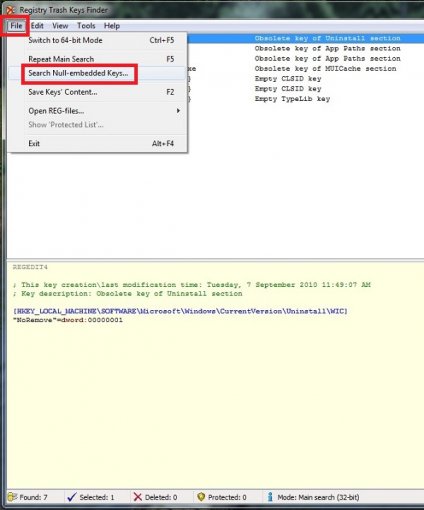
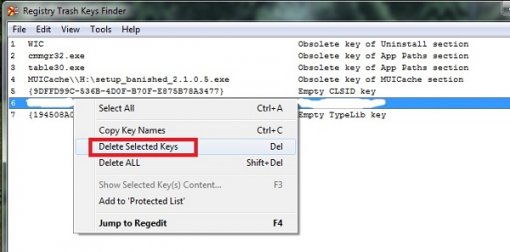
Once installed, go to ‘File‘ then select ‘Search Null-embedded Keys…’ This will find the SecuROM License key that you couldn’t delete before. Click on it and then look at what’s written in the bottom window to make sure it is the correct one. Once you know it is, click on the right one in the top window and right click on it, then select ‘Delete selected keys‘.
If no more are in there related to or named SecuROM, then you know it’s done.
The following images are here to help you know what to look for…
Step -1 On the TrashReg website…
Step – 2 Starting to use the TrashReg program…
Step – 3 Finding and deleting the SecuROM keys…
***
5. You can now restart your PC and do the Registry search again to make sure you didn’t miss anything the first time, and if nothing shows up in the repeated search, then you’re now SecuROM FREE …. Congratulations! You did GREAT 🙂
Note: A program that comes in handy after completing a removal tutorial is CCleaner. CCleaner has a free version, so if you want the free one, then make sure to download the free version and not the paid version.
———————————————————–
If you require further help with removing SecuROM, you can email me here.. lisa.pham@calipip-sims.com
Updated: 3rd June 2015


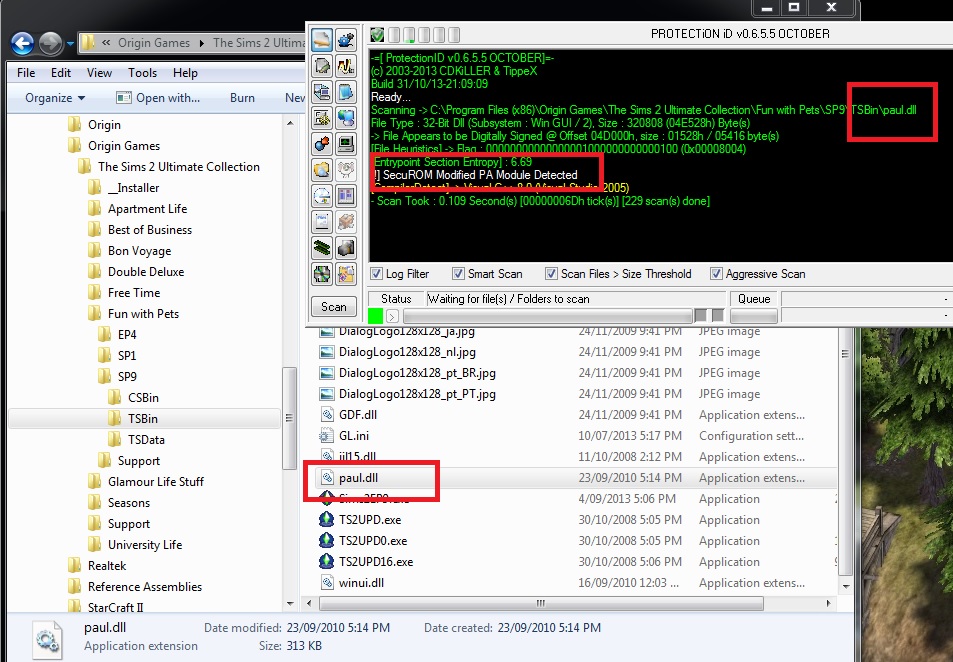
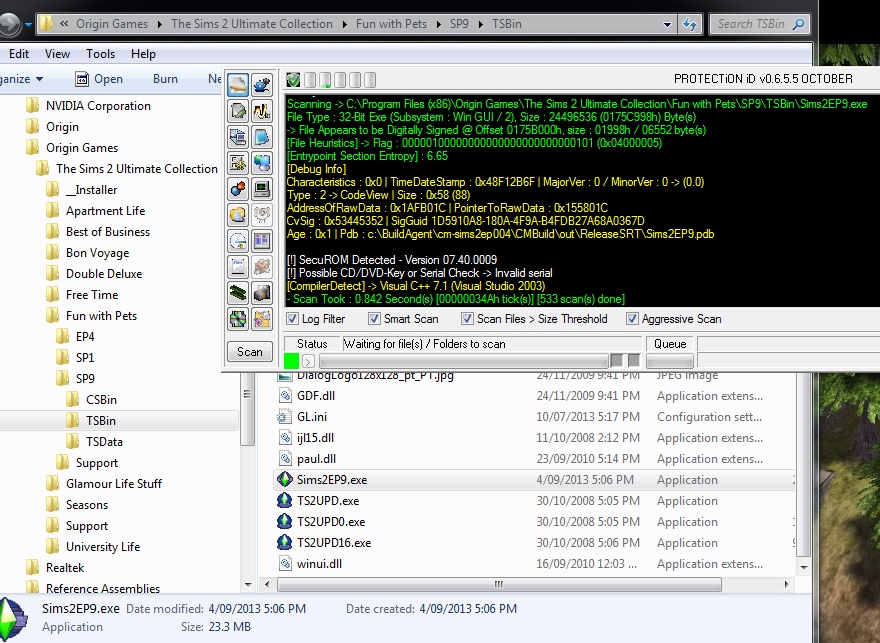 A known SecuROM file- paul.dll